Overview
The 0200-iSIC (Intelligent Sensor Interface and Control) features an integrated spread spectrum radio modem for connecting a PC to a radio network of 4100-iSIC or SDL500R data loggers.
What’s Included
- Data logger with spread spectrum modem
- 12 VDC battery
- A77 Programming cable
- iSIC Kit
- (2) Gland fittings
- (5) Desiccant packs
- RS-232 interface cable
- (4) 56 Ω resistors
Field Installation
1. Mount the data logger to a wall, pole, or other secure location above flood stage using the A55 Mounting Plate.
2. Connect the A38 grounding kit wire to the copper lug on the bottom of the 0200-iSIC data logger and the other end to an appropriate earth ground.
3. Mount the A44 radio antenna in a location that will provide a line of sight to the radio data loggers in the network. Attach an RF cable from the antenna to the radio RF port on the
0200-iSIC.
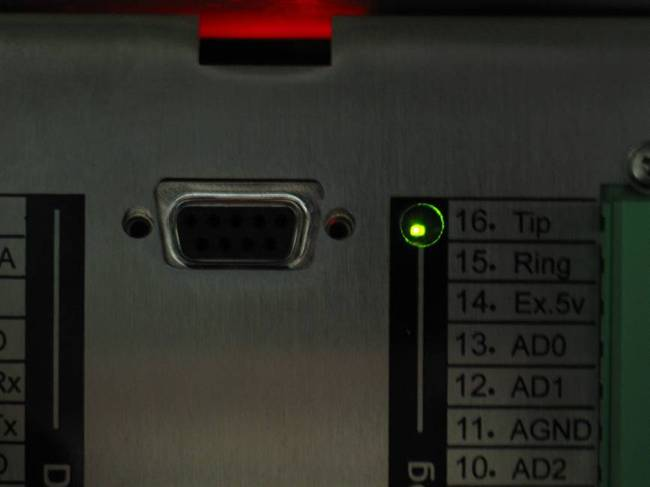
4. Power the iSIC by connecting the 12 volt battery. Observe the green blinking LED in the hole at the end of the analog terminal strip. This only blinks for 15-20 seconds during warm-up to confirm that the data logger is powered and ready.

Figure 1: Blinking Green LED Light
5. Connect sensors to the data logger. See the appropriate sensor interface manuals for wiring and other details. Bring any cables into the enclosure by removing a port plug and installing a gland fitting from the iSIC Kit.
Configuring with iChart
1. Install iChart software on a Windows computer.
2. Ensure power is supplied to the data logger.
3. Add the remote monitoring sites to an iChart project file.To accomplish this: Follow the Setup Device Wizard to add a site name, and then select “SDL500R” or “4100-iSIC” from the list of NexSens data loggers.
Note: If the 0200-iSIC will be used to communicate with an SDL500R or 4100-iSIC that is configured as an SDI-12 or Modbus controller, please refer to the appropriate online guide:
Setting an iSIC or SDL500 as a Modbus or SDI-12 Device
4. Add sensors in iChart by selecting the manufacturer and model number.
5. Continue the Setup Device Wizard and click Program iSIC to conclude configuration.
REV: 13L01
