In order to test a cellular modem is functioning properly, a few simple steps can be taken.
1. Connect an antenna to the modem.
2. Connect a RS-232 cable from the modem to your computer.
Note: A USB adapter may be necessary on newer computers that do not have a serial port.
3. Supply 12V power to the modem.
4. Confirm the following light patterns.
- Immediately after power is applied: Power light is solid.
- After about 30 seconds: Network light begins blinking.
- Within 2 minutes: Network light is solid and Signal light is blinking
- This final pattern is an indication that the modem is connected to the network. The faster the Signal light blinks, the better the signal strength.
- If the final light pattern is not achieved, move to a location with a better signal (such as outside). Remove power for at least 10 seconds then go back to Step 3.
5. Open a windows command prompt.
6. Ping the modem’s IP address by typing the following and hitting enter.
ping <IP Address>
Note: It is common for the first ping to time out.

Figure 1: Ping the Modem
7. Open Windows Hyper Terminal.
8. Enter any Name.
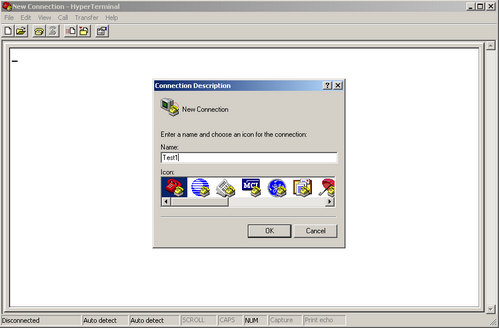
Figure 2: Hyper Terminal Connection Description
9. Click OK.
10. In the Connect using: dropdown, choose the COM port to which the modem is connected.
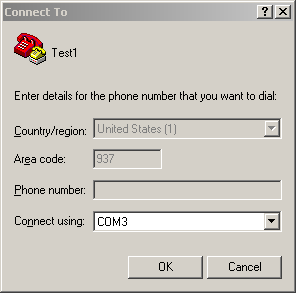
Figure 3: Connect To for COM
11. Click OK.
12. Select the following settings in the COM# Properties dialog.
Bits per second: 9600
Data bits: 8
Parity: None
Stop bit: 1
Flow control: None
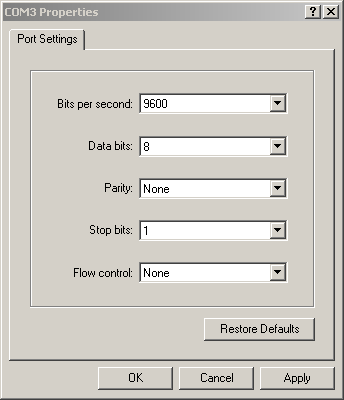
Figure 4: COM Properties
13. Click OK.
14. Open another Windows Hyper Terminal.
15. Enter a different name.
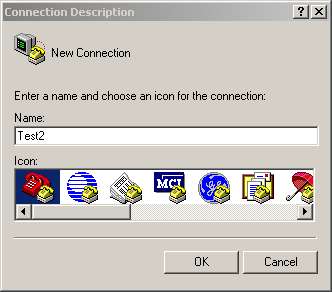
Figure 5: Connection Description
16. Click OK.
17. In the Connect using: dropdown, choose TCP/IP (Winsock).
18. In the Host address: box, type the modems IP address.
19. In the Port number: box, type 500.
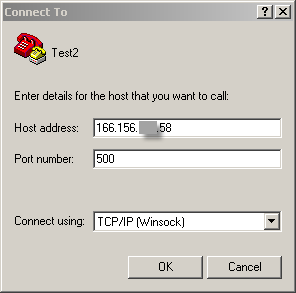
Figure 6: Connect To for IP
20. Click OK.
21. “Connected” should appear in the bottom left corner of both terminal windows.
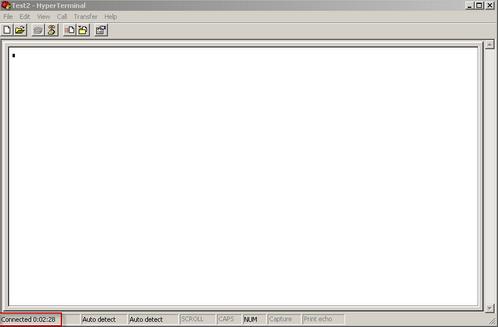
Figure 7: Connected Confirmation
22. Now you can send files using the “Transfer | Send File” on one terminal and “Transfer | Receive File” on the other terminal.
REV: 13G19
