When replacing a YSI sonde into a NexSens data logging system, it is critical that the parameter list (parameters and units) that the sonde will output exactly matches the parameter list for the sonde in iChart. Otherwise, the data shown in iChart will not correspond with the correct parameter. These steps will show how to replace a sonde and match the enabled parameters.
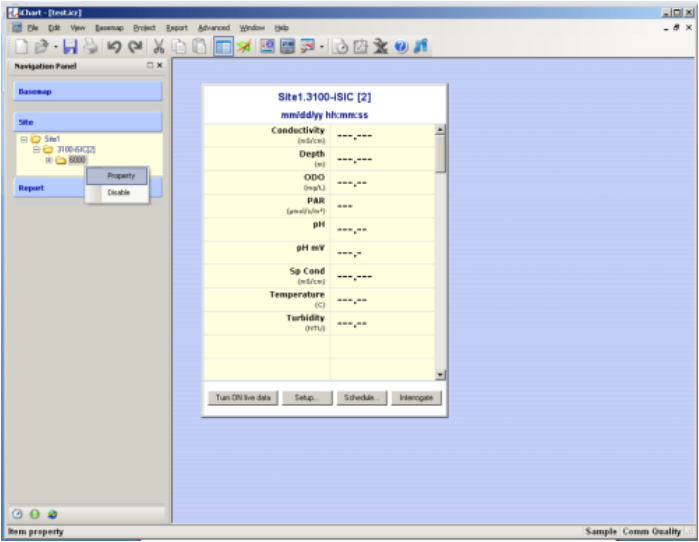
1. Check the parameters of the sonde in the iChart project file. In the Navigation Panel, under the site sub heading, right-click on the corresponding sonde, and select Property.

Figure 1: Open sonde properties
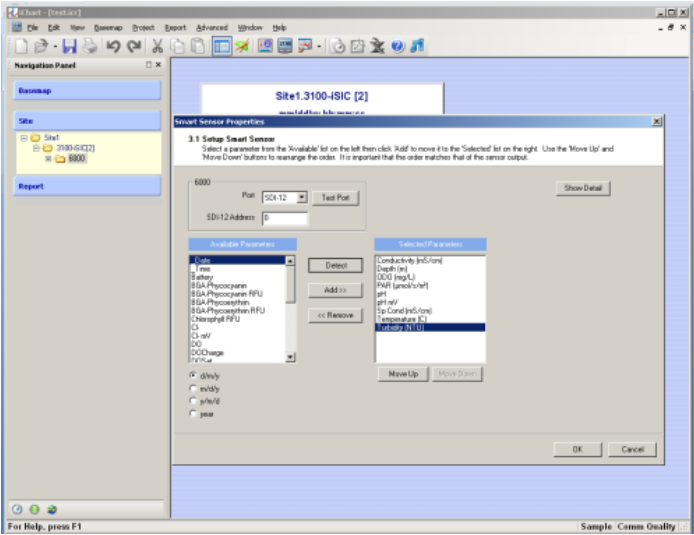
2. Record the enabled parameters and the units to which they are set. The sonde SDI-12 address is also displayed. Click Cancel to exit.

Figure 2: Copy sonde parameter list
3. For YSI 6-series sondes, use EcoWatch Software or a 650MDS Multi-Parameter Display to ensure that the enabled parameters match the parameters and units previously recorded.
a. If using EcoWatch, connect the sonde to PC with the appropriate interface cable. Go to Comm | Terminal and select the appropriate COM port. When the terminal opens, hit Enter or wait until the ‘#’ sign is displayed. Then type ‘menu’ and hit Enter to access the sonde menu.
b. If using a 650MDS, connect the sonde with a field cable, power on the 650MDS and click Sonde menu.
c. Go to Sensors and confirm which sensors are enabled on the sonde. When finished, hit 0 (EcoWatch) or Esc (650MDS) to return to the sonde main menu.
d. Go to Report and confirm that the correct parameters are enabled. Also verify that the units match those in iChart (see Step 2).
e. Go to System and note the SDI-12 address of the sonde.
f. Exit the sonde menu and disconnect the sonde.
For YSI EXO sondes, use KOR software to confirm the parameter list.
4. Reconnect the sonde to the NexSens iSIC or SDL500 data logger. Take a sample reading to ensure that the sonde is communicating and the parameters are correct. Go back to Step 3 if the parameter list needs to be updated.
REV: 13G17
