
Update Firmware
Firmware for X-Series data loggers is updated periodically to account for new features, more environmental sensors, and any bug fixes. Upon request, a technical support technician at NexSens Technology can provide a ‘.bin’ file containing the latest firmware. This file must then be copied to the proper folder within the CONNECT directory. When a firmware update is initiated, the CONNECT software will access the file to start the update process.
Note: Windows automatically hides the CONNECT directory from view, making it unavailable on the PC’s local drive. Use the following process to locate the correct folder and transfer the latest firmware file.
Firmware File Location
- Once receiving the firmware file from a NexSens technician and downloading it to a known location, open the CONNECT software.
- Go to the DATA tab, then click Open Data Folder
- The hidden directory for the CONNECT software will now be visible in the PC’s file explorer.
- Ex: “C:\ProgramData\NexSens\CONNECT\Data”
- The hidden directory for the CONNECT software will now be visible in the PC’s file explorer.

Figure 1: Local file directory in CONNECT Data folder.
- Use the up arrow to move to the CONNECT folder.
- Ex: “C:\ProgramData\NexSens\CONNECT”
- The CONNECT folder should contain an internal folder titled FirmwareUpdate.
- If the FirmwareUpdate folder is not visible, create a folder with that exact name. The CONNECT software will pull from that directory.

Figure 2: FirmwareUpdate folder location within the CONNECT directory.
- Copy the ‘.bin’ file into the FirmwareUpdate folder.
- Since CONNECT always looks for the latest firmware image based on the firmware version and date code embedded in the ‘.bin’ file name, there is no need to remove any other firmware files from the folder.
Code Update via Direct Communication Cable (UW6-USB-485P)
Note: For X3 Environmental Data Loggers, Bluetooth (BLE 5.0) functionality is available and provides a more seamless firmware update. Please skip to the Code Update via Bluetooth section if a firmware update is needed for an X3.
- Connect the X-Series logger logger to a PC. Test connection by reading the RTC clock of the logger in the CONFIG tab.
- Navigate to Tool | Code Update.

Figure 3: Navigate to Tool | Code Update.
- The Firmware Update main menu will appear.
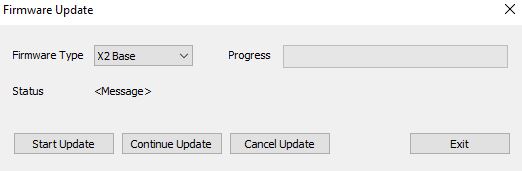
Figure 4: Firmware Update menu.
- Choose the appropriate Firmware Type from the drop-down list.
- For most applications, the base firmware will be updated. Before beginning the firmware update, check with a NexSens technician.
- Click Start Update.
- Note that this process can take up to 30 minutes to complete (~10 minutes is typical).
- If the firmware update fails midway through, click Continue Update until the update is complete.
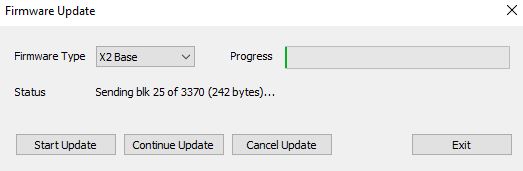
Figure 5: Firmware update started.
- When the firmware update has been completed, two dialog boxes will appear in succession indicating it has successfully initialized and installed.
- Exit the firmware update menu.
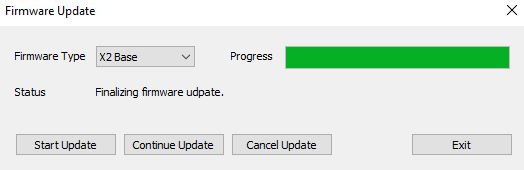
Figure 6: Update complete, exit update menu.
- On the Configuration tab, click the Reset X2 button to finalize the firmware update.
- This should occur in ~10 seconds.
- For pole mount X2 data loggers, an orange light will be on constantly, indicating that the firmware update is still in progress. Once the update is complete, the light patterns will return to normal.
- For X2-CB and X2-SDL data loggers, the data logger will not beep on powerup as usual. Once the firmware update is complete, the logger will beep once, followed by two beeps for signal connection.
- Following reset and completion, confirm the updated firmware version. Go to Tool | RTU and read the X2 Info at the bottom of the interface.
- The base firmware should contain the newest firmware version.
Code Update via Bluetooth (X3 loggers only)
The X3 Environmental Data Logger has built-in Bluetooth connectivity (BLE 5.0). Using the CONNECT software (version 4.24.5.2 or later), users can update the firmware via Bluetooth. The CONNECT software will turn off the logger’s internal schedule to avoid any interference with the transfer process.
Prior to proceeding, verify that your PC or laptop is compatible with Bluetooth BLE 5.0. This step ensures a seamless transfer process. Additionally, disable the Bluetooth of any nearby devices during the transfer to prevent any potential connection issues. NexSens recommends the tp-link Bluetooth 5.0 Nano USB Adapter as an affordable Bluetooth adapter option.
- Connect the X3 logger to a PC and launch the CONNECT software. Test the connection by reading the logger’s RTC clock in the CONFIG tab.
- Navigate to Tool | Code Update X3 (BLE)
- The CONNECT software will open up the X3 Firmware Update (BLE) utility.

Figure 7: Firmware update Bluetooth utility.
- Confirm that the device name matches the logger’s body tag. Then, select the X3MAIN or X3RTU device, depending on the firmware type. If you are uncertain about the firmware type (i.e., either MAIN or RTU), check with a NexSens technician.
- If the incorrect logger or no logger is displayed, cycle power (disconnect and re-connect the power source) on the logger and then select Re-Scan.
- If the logger is still not shown, double-check the Bluetooth settings on the connecting device.
- Once the proper logger is selected, enter the last five digits of the logger’s body tag (e.g., 01020) as the Passcode.

Figure 8: X3 Firmware Update (BLE) utility.
- Select Start at the bottom and then Yes if you want to start the firmware update.
- The utility will display the progress of the file transfer.
- Once complete, the Status will display Sending OTA done. The logger will reset automatically to complete the update.

Figure 9: Firmware update in progress.
- Following reset and completion, confirm the updated firmware version. Go to Tool | RTU and read the X2 Info at the bottom of the interface.
- The base firmware should contain the newest firmware version.