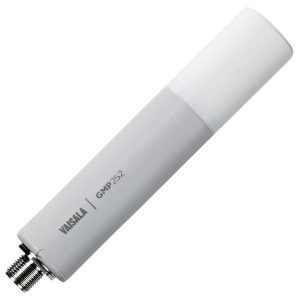
Vaisala GMP252 Carbon Dioxide Probe X2 Integration Guide
The Vaisala GMP252 Carbon Dioxide (CO2) Probe measures atmospheric CO2 concentrations (ppm) in agriculture, refrigeration, greenhouses, and demanding HVAC applications. The probe is compatible with the X2 data logger using the Modbus-RTU communication protocol and the RS-485 sensor interface. A pre-defined script on X-Series data loggers is able to detect, log and transmit all parameters from the probe. Parameter data is transmitted, in real-time, at a user-specified interval (e.g., 10 minutes) to the NexSens WQData LIVE Web Datacenter. There, data is stored on customizable dashboards with statistics and graphical interfaces for each parameter. Users can download and send data reports via Email, FTP, or an API. Below is information on the settings and wiring required to integrate these sensors with a NexSens X-Series data logger.
Compatible Models
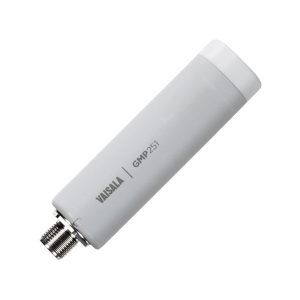
Vaisala produces two versions of the GMP25x Carbon Dioxide Probe. Both models require the same wiring and adjustment in the settings below to integrate with NexSens X-Series data loggers.
Probe Integration
The Vaisala GMP252 CO2 probe only outputs a single CO2 (ppm) measurement. The sensor measures atmospheric CO2 based on the known absorption of infrared light by CO2 at a characteristic wavelength. As CO2 passes through the open channel at the top of the sensor, an infrared light source travels through the gas and reflects off a mirror to a thermopile detector. The detector has a band-pass filter that is channeled to measure the characteristic wavelength in which infrared light is absorbed by CO2. By measuring the ratio of absorbed infrared light with a reference signal, the sensor is able to determine the concentration of CO2 (ppm) in the measured sample.
1. Wiring for Direct Communication
For direct communication with the sensor, follow the wiring information below and follow the Configure Communication section to set the appropriate settings for communication with an X-Series data logger.
| Vaisala M12 Cable Wire Color | Signal |
| Brown | 12-30VDC |
| White | RS-485 B |
| Blue | GND |
| Black | RS-485 A |
2. Configure Communication
The GMP252 sensor can be configured in a terminal emulator software such as Tera Term. Changes to the communication output and frame must be made before the sensor can communicate with the X-Series data logger.
- Set the terminal emulator serial port communication to the following:
- Baud Rate: 19200
- Data: 8 Data Bits
- Parity: None
- Stop: 1 Bit
- Flow Control: None
- Enable Local Echo to visualize the entered commands.
- While connecting the GMP25x sensor to the Vaisala USB cable or an external power source, simultaneously press and hold the Enter key.
- If a successful communication is established, the sensor model and version will appear in the terminal.
- Ex: GMP252 1.3.4
- If a successful communication is established, the sensor model and version will appear in the terminal.
- Once the connection is established, the following commands must be configured for communication with an X2 data logger:
- smode Modbus
- addr 1
- seri 19200 N 8 1
- Send the ? command to confirm the changes to the device settings.
- Send the seri command to confirm the changes to the serial communication.
3. Automatic Sensor Detection
After adjusting the internal communication settings, the sensors and their parameters can be programmed onto the logger via automatic detection.
X-Series Script Information
The X-Series data logger includes a pre-loaded Vaisala GMP25x script, which is enabled by default upon shipment. For new data loggers, connecting the sensor and providing power will force the data logger to run through an automatic detection process.
For loggers with adjusted settings, use the link below to confirm the script is enabled before running a sensor detection.
| X2 Script Number | Communication Protocol | Baud Rate | Power Type | Warmup Period (sec) | Frame |
| 1009 | RS-485 | 19200 | Switch | 240 | N81 |
Read Sensor Configuration – Confirm Sensor Detection
After ~5-10 minutes, read the sensor configuration to confirm the sensors have been detected on the data logger. Thoroughly review the parameter list to ensure all parameters are accounted for and are measured in the desired units. Let the unit gather a few readings to confirm accurate and reasonable parameter data.
4. Setting up WQData LIVE
Once an X-Series data logger has finished a new sensor detection, it will automatically push the sensor configuration to the WQData LIVE Web Datacenter. Follow the three articles below to create a WQData LIVE account and a project/site. Then add the data logger to the project using the included claim code.
- Create a WQData LIVE Account
- Create a Project on WQData LIVE
- Add a Data Logger to a Project on WQData LIVE
Real-Time System Application
Real-time atmospheric CO2 measurements from the Vaisala GMP252 Carbon Dioxide Probe are useful in various environmental monitoring applications.
Applicable Systems
Discover applicable uses for the Vaisala GMP252 Carbon Dioxide Probe.
Case Studies
Read about specific applications using Vaisala GMP252 Carbon Dioxide Probe.
Sensor Manual
For more information on the Vaisala GMP252 Carbon Dioxide Probe, download the Vaisala GMP252 User Guide.


